
If I had a dollar for every time someone told me that they don’t paint with their little one because it’s too messy or too much work, I’d have a nice start to Sweet Pea’s college fund. Seriously. So, as someone who paints often with a little one, here are some pointers to help make clean up easier and the whole process less messy and less intimidating. Note: we mostly do process-based painting, so it’s child-centered and about their learning rather than art that’s based on a specific outcome.
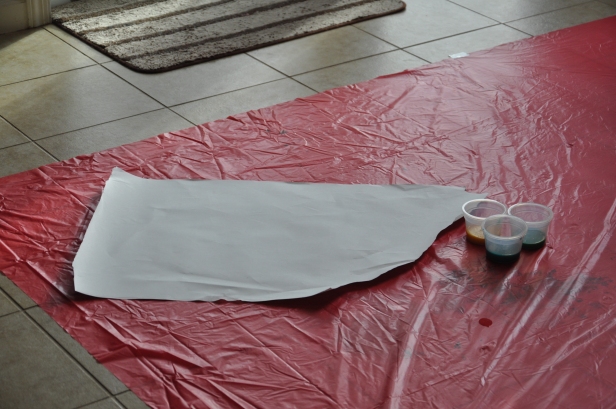
1. Invest (spend $3-5) on a plastic shower curtain or table cloth. Put it down on the floor below whatever surface you’re painting on, or paint directly on it by sitting on the floor. Reuse it each time you paint by folding up the top surface that might have paint on it so it’s on the inside. Who cares if it dries this way? It’ll peel apart the next time you use it. Trust me. I’m a pro at that. 😉
2. Have your little artist paint in his/her diaper so you don’t make a mess on their clothes. Or, get them a set of (stained?) clothes to paint in, as dedicated “paint clothes.” The point is to have them in something you’re not worried about staining. Sweet Pea knows that when it’s time to paint, her clothes come off, and she eagerly helps with this so she can paint as soon as possible.
3. Wear your own “paint clothes” so you’re not worried about getting paint on you. It’ll make it more enjoyable. I promise.
4. If you’re using a table, put something down on it to protect the surface. This can be newspaper, a cut up plastic garbage bag, another plastic table cloth or shower curtain… You get idea. I personally like plastic table cloths or shower curtains because they’re reusable and won’t absorb the paint. Plus, sometimes you can find them at the dollar store.
5. Pour a small amount of paint (tempera, finger paint, acrylic paint, homemade paint, etc) onto an old lid, on a disposable plate, or some other surface you can easily rinse or toss when done. Do NOT let your little artist do this step because you’ll probably end up wasting paint (it’s better to add paint than try to put it back in the container or throw it away). If it’s your little one’s first few times painting, you might want to put the paint directly in the paper so they don’t need to transfer it themselves.
Keep in mind that your little artist will mix the colors, so choose ones that will blend nicely together.

6. Set out the paper or whatever your little one is painting. For new painters, taping the paper down helps a lot.
7. In the beginning, let your little artist use his/her fingers and hands to paint (it’s a great sensory activity). As he/she gets older and more advanced (and is likely better at using spoons and forks), paint brushes, sponges, etc can be used for painting (more on that later).
Tip: If your little artist is still into tasting stuff, try using condensed milk and food coloring to make edible paint. Repeating, “hands only” or something similar also helps, as does being willing to put it all away if your little one is old enough to understand not to taste the paint but chooses to do so anyway.

8. Have space to place painted paper so it can dry. Have extra paper readily available in case your little artist is really into painting. You don’t want to have to go running off for more paper or stop your artist prematurely.
9. Clean up your little one with a wash cloth, soap, and water (great to already have these things set up by your sink before you start painting) and put your little one in a clean diaper so he/she is ready to run around.
10. Clean your surfaces and fold up those handy-dandy shower curtains or table cloths. Rinse your brushes if used. Once you’ve put your materials away, pat yourself on the back for a job well done.
What do I do with their art?
– Use it to make cards for family members. Think hearts for anniversaries, Valentine’s Day, Grandparent’s Day, etc. cut out circles to make balloons for birthday cards… How to turn your child’s art into greeting cards
– Before it dries, if paint is globbed on thick enough, make a print on folded card stock. Add words or stickers and you’ve got a custom card.
– Hang it up for your little artist to see. It’s great for their self-esteem and is a good conversation piece.
– Stick it in a file folder with their name and date. Weed through their art once you’ve collected a lot and save the best pieces or photograph it all to keep it forever.
– Glue it on black paper to “frame” it (or “mat” it.
– Use it as wrapping paper.
REALLY don’t want to deal with the mess?
Cut paper to fit in a gallon sized ziplock bag. Put some paint on the paper and carefully slip it inside the bag. Seal it closed. Let your little one squish the paint around. Using their toes can be fun too! 🙂
For MORE ideas, check out this follow up post: Painting Tools.
